13
Sep
How to Acid Stain Concrete
Here at Concrete Floor Supply, we're passionate about helping you unlock the full potential of your concrete surfaces. One way to achieve a truly unique and transformative effect is through acid staining. Often utilized in high-end residential and commercial spaces, acid staining isn't just about adding color – it's about creating an artistic expression in your concrete.Materials and Tools for Acid Staining Concrete
Before you dive into the process, gather the necessary materials and tools:- Safety gear: gloves, eye protection, respirator, painter’s tape
- Concrete cleaner and degreaser
- Acid stain system
- Diamond grinder pads: Concrete DNA Satellite diamond pads (30 grit)
- ⅜ nap roller
- Microfiber Mop Pad
- Low-speed floor buffer
- Pump-up sprayer or industrial-strength plastic sprayer (1 gallon)
- Concrete sealer -Concrete Floor Supply sealer gloss or matte
Safety First: A Crucial Consideration
Acid staining involves working with chemicals. For your safety, we strongly recommend adhering to these safety precautions:Gear Up:
- Always wear proper personal protective equipment (PPE) such as gloves, eye protection, and a respirator when handling chemicals.
Ventilation is Vital:
- Ensure adequate ventilation in the workspace to avoid inhaling chemical fumes.
Follow the Manufacturer's Guidance:
- Each acid stain product will have specific safety instructions. Always follow these guidelines meticulously.
Unveiling the Beauty Beneath: The Acid Staining Process
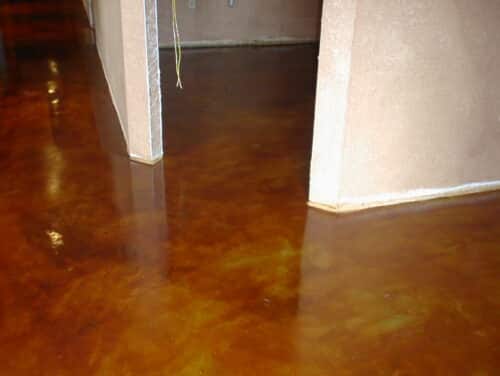
Acid staining utilizes a chemical reaction to draw out the inherent beauty of your concrete floor. The stain reacts with the minerals within the concrete, creating a stunning, variegated color effect. Unlike paint, which coats the surface, acid stain penetrates the concrete, creating a translucent, richly colored masterpiece. Each acid-stained concrete floor will have its unique reaction.1. Preparing Your Concrete Canvas
As with any successful art project, proper preparation is paramount to ensure a clean, smooth, and profiled surface. Here's a breakdown of the steps involved in achieving an exceptional acid-stained concrete floor:-
Repair:
We recommend a cementitious repair product for fixing cracks and spalls. These products accept stain. Just remember they will stain differently. Cement-All is a great one and can be found at Home Depot. -
Cleaning:
It is suggested that the cleaners be used with a low-speed floor buffer and a black cleaning pad. Your goal is to clean all contaminants off the floor. Concrete Floor Supply provides cleaners for various surface conditions- Super Blue: to open up the concrete (safe alternative to muriatic acid). This should be considered mandatory if you’re not using diamond tools to prep.
- Citra Peel: to remove cures and acrylic sealers
- Citra Pro: cleaner/degreaser to use on its own or after the above cleaners
-
- Clean the floor with the above-chosen cleaners and allow the surface to dry. Remember prep work generally requires some trial and error when there are previous coatings, sealers, glues, etc. Feel free to reach out to us about this.
- Tape and mask off any areas you want to protect from stain overspray.
-
Profiling:
One of the most overlooked and important steps in staining your concrete floor is creating the proper surface profile or “CSP” (Concrete Surface Profile). The reason this is so important is that you need the acid stain to penetrate the floor, but more importantly, you need a profile for the sealer to properly bond to the floor so it doesn’t peel.- Inside concrete should be done with a Concrete DNA Satellite pad in a lower grit such as a 30-grit
- Outside concrete can be profiled using a diluted version of Super Blue followed by thoroughly rinsing the concrete. Note: Outside concrete is typically more porous and broom-finished. The Super Blue helps to clean and further open up the pores.
2. Applying Your Artistic Vision: The Staining Process
- We recommend putting the stain in a one-gallon pump sprayer (a cheap one will work fine). Make sure to test that the pattern is going to be what you want before you start spraying stain on your floor. Spray into a bucket or test spray a closet or inconspicuous area before doing your floor. Always test first!
- Spray the stain onto the floor in a manner that covers the concrete 100%. Keep the same spray movements throughout the job. (Evenly erratic patterns work best as you don’t want the same back-and-forth movement as the stain will look that way when it dries) If desired the stain can be sprayed on the floor and spread around with a broom or even blown with a blower creating decorative effects. Remember: it's a reactive stain so your actions will create various effects.
- Allow the stain to dry and put on another coat of stain if desired.
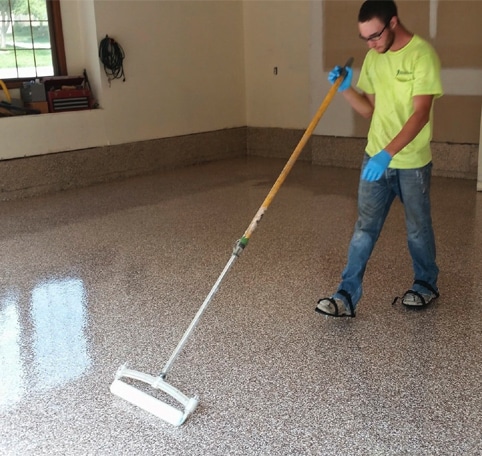
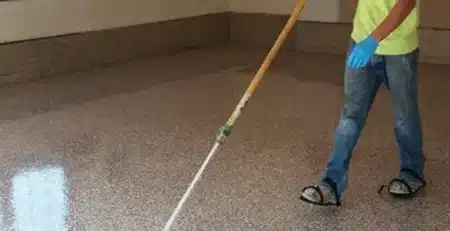
- After the stain has dried and is done reacting with the floor (typically 2 to 8 hours depending on conditions) the floor should be thoroughly rinsed with water and wet mopped to get any residue left behind by the acid stain. Adding some baking soda to the water can help neutralize if desired. The most important thing is to use plenty of water and multiple passes to ensure there is no chalky residue left on the floor.
3. Sealing Your Acid Stained Concrete
Generally, you need two coats of a sealer or clear coat to get an even final finish. Allow your floor to dry for a minimum of 24 hours before applying any sealer or coating. Moisture from prep and cleaning needs to be out of the floor before sealing so it doesn’t become entrapped. Here are some options.-
- Crete Seal Plus EXT: An outside sealer available in gloss or matte.
- WB Urethane Gloss: 2-component water-based urethane, very durable and crazy good adhesion.
- There are many other options to seal your acid-stained concrete.